Are Project Plans Always Necessary for a Woodworking Projects?

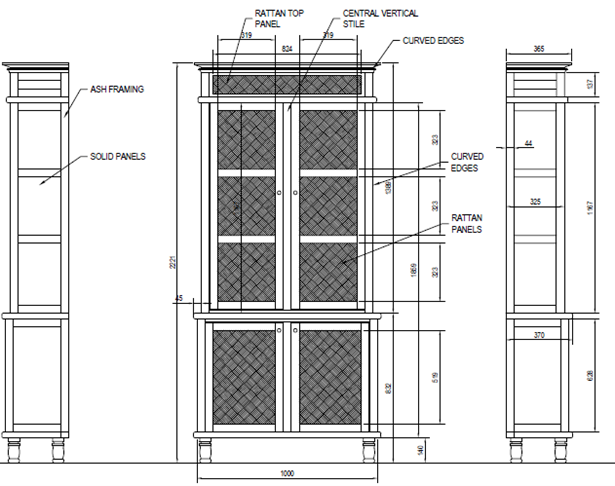
Yes, is the simple answer to this question. I always prepare accurate plans no matter how small or complicated the project is. When building a project, I always have a plan sitting on my bench. They very useful for working out the stock required for the build and for reference purposes when cutting stock down to size.

In my workshop I have a host of woodworking machines including a CNC machine. Accuracy is key during a project build and the more detailed the project plans are the better the end results.

A drawing can be as simple a hand sketch or prepared on a computer using proprietary software. There are lots of software packages available on the market some of them are free while others you pay for. Draftsight is a relatively inexpensive drawing package for producing 2D drawings while Google Sketchup which is free can be used for producing 3D models. Most start up drawing packages are usually quite easy to use.

Preparing project plans in 3D is fantastic as the software allows you to zoom and look within your project that a normal 2D drawing will not show. In this instance you need to use your imagination to look within. With a 3D model the user can zoom and manoeuvre within the project. This is very useful when working out any special support brackets or jointing required.

Get into the habit of preparing detailed plans for your project it will save you a lot of time.

Blog 1 cover

Creating Splay Legs

Square splayed furniture legs can add a touch of elegance to any piece of furniture but can be difficult to achieve. Hand holding a piece of wood and cutting on a table saw can produce inaccurate results and potentially very dangerous.

However, with a simple inexpensive shop made jig tapered legs can be created with ease and in a safe manner.

The jig requires a scrap piece of plywood, an offcut of wood to act as a fence and some ironmongery.

The jig example below fits to the track on a sliding table saw however it could be adopted to fit any type of table saw that has a recessed track parallel to the blade.

Firstly, cut two slots in the plywood that used to secure the adjustable fence allowing any size of table leg for tapering.

The fence is positioned and locked with a couple of plastic screw knobs.

A piece of hardwood in this instance 16 x 16mm is glued and screwed to the bottom of the plywood parallel with the leading edges. This allows the plywood panel to fit snuggly into the track on the sliding tabletop.

Jig in position on the sliding table saw.

Clamps are used to secure the wooden leg to the jig preventing any movement during the sawing process. The clamps in the image below are by Kreg which are very handy as they adjust automatically to the size of the wooden leg. Once clamped no further adjustment is necessary and they hold the wood securely.

That’s it you’re ready to cut tapered legs.

A simple jig producing fantastic results that speaks for itself.